Did you know that properly installed asphalt shingles can withstand Bronx winters for 20+ years while saving you thousands in professional installation costs? How to install asphalt shingles correctly is essential to achieving this longevity.
As experienced roofing contractors serving the Bronx community for over two decades, we’ve helped countless homeowners successfully tackle this project. This guide to roofing breaks down theprocess into manageable steps that balance quality with practical DIY techniques.
Whether you’re doing minor roof repair, replacing damaged shingles, or installing a completely new roof, this guide will walk you through the entire process. You’ll learn exactly what materials you need, how to prepare your roof properly, and techniques to ensure your installation stands up to Bronx’s unique weather patterns.
Essential Preparation and Safety Measures for Roofing Projects
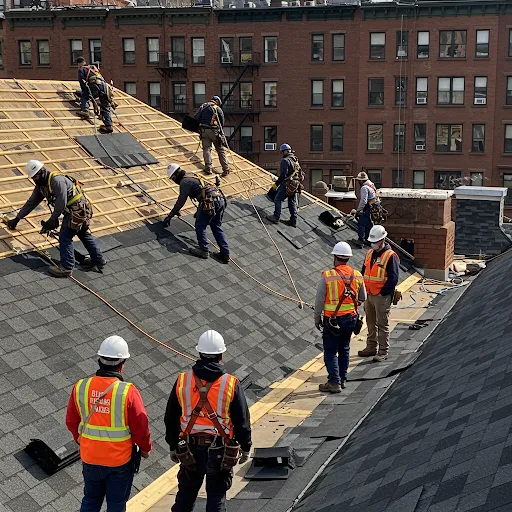
Starting your roofing project without proper preparation can lead to accidents, wasted materials, and poor installation results. Safety equipment isn’t just a recommendation—it’s essential for preventing serious injuries during your asphalt shingle installation.
Safety Equipment and Precautions for Bronx Home Roofing
Roofing work involves significant fall risks, especially on Bronx’s iconic multi-story buildings. Before climbing that ladder, gather these essential safety items:
- Roofing harness with secure anchor points
- Non-slip rubber-soled boots for better traction
- Heavy-duty work gloves to prevent cuts and blisters
- Safety glasses to protect from flying debris
- Hard hat to guard against falling materials
Never work alone on your roof, especially in the Bronx’s often unpredictable weather conditions. Always have a helper on the ground to stabilize ladders and assist with materials.
Tools and Materials Checklist for Asphalt Shingle Installation
Understanding what are asphalt shingles and creating detailed materials and safety checklists before starting saves time and prevents mid-project trips to the hardware store. For an average 1,500 square foot Bronx home, you’ll need:
- 45-50 bundles of asphalt shingles (3 bundles per 100 sq ft plus 10% waste)
- 4-5 rolls of roofing underlayment
- 1-2 rolls of ice and water shield (critical for Bronx winters)
- Roofing nails (approximately 2.5 lbs per 100 sq ft)
- Hammer or pneumatic nail gun
- Utility knife with hook blade for cutting shingles
- Chalk line for marking straight lines
- Roofing cement for sealing flashings
Investing in high-quality shingles with enhanced wind resistance can significantly reduce maintenance costs.
Step-by-Step Asphalt Shingle Installation Process
Each step in the roof installation process builds on the previous one, creating a water-tight roofing system that protects your Bronx home for decades. Follow these steps carefully to ensure professional-quality results.
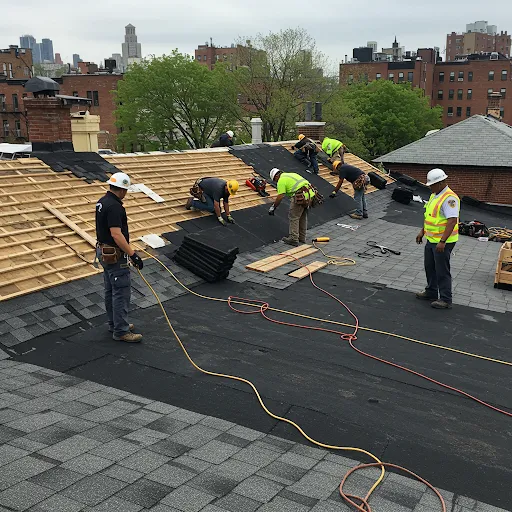
Preparing Your Roof – Removal and Deck Inspection
Proper preparation creates the foundation for a successful roof replacement. Start by removing all existing roofing materials down to the deck.
Use a roofing shovel or garden fork to lift old shingles, working from the top down in sections of 3-4 feet wide. Remove all nails or hammer them flat to create a smooth surface. Clean the deck thoroughly, removing all debris.
Inspect the entire deck for:
- Soft or rotted wood that needs replacement
- Loose boards requiring additional fastening
- Proper ventilation points in the roof system
Addressing any structural issues before installing new shingles is crucial for preventing future leaks and ensuring the roof’s longevity. A solid, well-prepared deck provides the necessary support for your new roofing system, protecting your home from costly water damage down the line.
Installing Underlayment and Flashing
Underlayment provides a critical secondary water barrier beneath your shingles, especially important during Bronx’s heavy rain seasons. Begin at the bottom edge of the roof and work upward.
First, install a drip edge along the eaves (bottom edge) of the roof. Then apply ice and water shield over the drip edge, extending it at least 24 inches past the interior wall line—this extra protection is essential for preventing ice dam damage common in Bronx winters.
For the rest of the roof:
- Roll out underlayment horizontally, starting at the bottom
- Overlap each row by 4 inches and end seams by 6 inches
- Secure with cap nails every 8-12 inches
- Install drip edge along the rakes (sides) of the roof on top of the underlayment
Pay special attention to valleys and roof penetrations, using proper flashing techniques to prevent future leaks.
Starter Shingle Placement Techniques
Starter shingles create a critical water-tight seal along the roof edges. Without properly installed starter strips, wind-driven rain can penetrate beneath your shingles.
To install starter strips:
- Position the starter shingles with the adhesive strip facing up and toward the edge of the roof
- Overhang the drip edge by ¼ to ¾ inch
- Nail 3-4 inches above the roof edge, using 4-6 nails per starter shingle
- Install along both the eaves and rakes for complete protection
Many Bronx homes experience wind-driven rain from various directions, making complete starter strip installation around all edges particularly important.
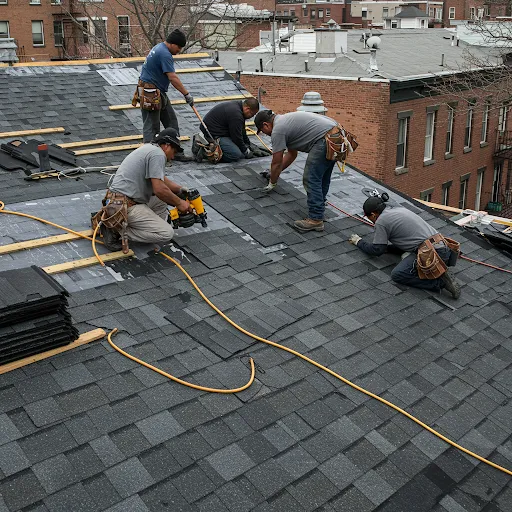
Laying and Nailing Asphalt Shingles Properly
The main shingle courses require careful alignment and nailing for maximum wind resistance and water protection. Start at the bottom of the roof and work upward.
For proper installation:
- Lay the first full shingle at the bottom corner of the roof
- Secure each shingle with 4-6 nails (6 nails recommended for Bronx’s windy conditions)
- Place nails 1 inch above the cutout and 1 inch from each edge
- Cut the first shingle of the second row to create a staggered pattern
- Maintain a 5-6 inch exposure (or according to manufacturer specifications)
Proper nail placement is crucial for shingle performance. Nails driven too high miss the underlying shingle, while nails driven too low remain exposed and can lead to leaks.
Ridge Cap Installation and Finishing Touches
The ridge cap completes your roof system, providing protection at the most vulnerable peak areas while creating a finished appearance.
To install ridge caps:
- Bend specialized ridge cap shingles or cut regular three-tab shingles into individual pieces
- Starting at the end opposite the prevailing wind direction, nail each cap
- Overlap each piece by 5-6 inches, covering the previous cap’s nails
- Seal the final cap’s exposed nails with roofing cement
For Bronx homes with steep pitches, adding a small bead of roofing cement under each ridge cap provides extra wind protection during harsh winter storms.
Maintaining Your Asphalt Shingle Roof in Bronx Weather Conditions

A properly installed roof still requires regular maintenance to achieve its full lifespan potential. The freeze-thaw cycles and variable weather in the Bronx create unique challenges for roof systems.
Seasonal Inspection Tips for Bronx Homeowners
Developing a regular inspection routine helps identify minor issues before they become costly problems. After each season, check your roof for:
- Missing or damaged shingles (especially after high winds)
- Debris accumulation in valleys and gutters
- Signs of algae or moss growth (common in shaded Bronx roofs)
- Proper function of all flashing around chimneys and vents
- Sealant integrity around roof penetrations
How would you feel discovering a small, easily fixed issue before it causes thousands in water damage to your home?
When to Call Professional Roofing Services
While many maintenance tasks are DIY-friendly, certain situations require professional expertise. Contact a qualified Bronx roofing contractor when you notice:
- Multiple missing or damaged shingles
- Sagging areas in the roof deck
- Water stains on interior ceilings or walls
- Significant granule loss in gutters
- Visible light through the attic roof boards
Ignoring these warning signs can lead to costly structural damage. Addressing roofing issues early ensures your home stays protected and prevents expensive repairs down the line. When in doubt, consulting a professional is the best way to maintain a safe and durable roof.
Your Roof’s Long-Term Success – Next Steps
Installing your own asphalt shingles can deliver professional results when you follow the proper techniques outlined in this guide. The time and attention you invest now will protect your Bronx home for decades to come.
Remember that proper installation involves more than just nailing down shingles—it’s creating a complete water management system designed to withstand Bronx’s unique climate challenges.
Ready to start your roofing project? Begin by assessing your current roof condition and gathering the necessary safety equipment. For personalized advice specific to your Bronx home’s unique requirements or to schedule a professional roofing service or inspection, contact our experienced team today.
CALL US AT 929-570-7620